
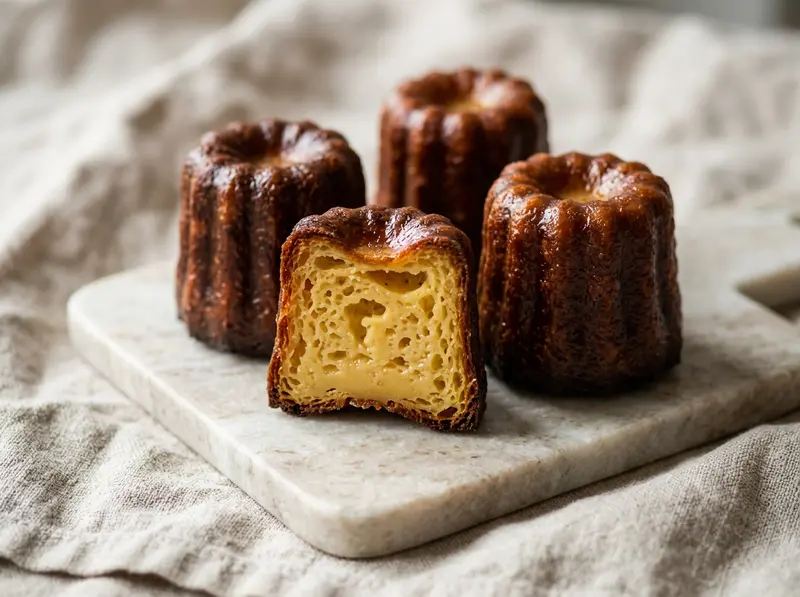
Canelés de Bordeaux (French Rum and Vanilla Pastries)
A canelé, also spelled cannelé (カヌレ, kanure, in Japanese), is a small fluted cake from Bordeaux in France. It is made from a thin batter of milk, eggs, sugar and flour flavoured with rum and vanilla, and it is baked until the outside is a dark caramelised crust while the inside is still soft and custardy. Its full name is canelé de Bordeaux, and the spelling with one n has been the official one there since 1985. In Bordeaux canelés are baked in tinned copper moulds, traditionally coated with beeswax. This home version makes 12 in a buttered nonstick metal canelé tray, or in a silicone one, so the crust comes out a little less dark and glossy than a pastry shop's. The first day takes about 30 minutes, half of it waiting for the milk to cool, and then the batter rests in the fridge for 24 hours. On the second day allow about 3 hours in all: 1 hour for the batter to lose its chill while the oven heats, about 1 hour 10 minutes of filling and baking, and 1 hour for the canelés to cool.
What is a canelé?
A canelé is a small cake from Bordeaux with fluted sides, a dark caramelised crust and a soft inside that tastes of rum and vanilla. The word means fluted. You will see it written both canelé and cannelé. The spelling with one n became the official one in 1985, when makers in Bordeaux founded the Confrérie du canelé de Bordeaux and took it as their collective mark. In Japanese it is カヌレ, in full カヌレ・ド・ボルドー.
Nobody knows for certain where the canelé comes from. One story credits the nuns of the Annonciades convent in Bordeaux. Another ties it to the wine trade, which used egg whites to clarify wine and left the yolks over, and to the port, where rum and vanilla arrived. These are hypotheses. According to the French magazine Slate, the first written traces of the canelé in its present form date only from the 20th century.
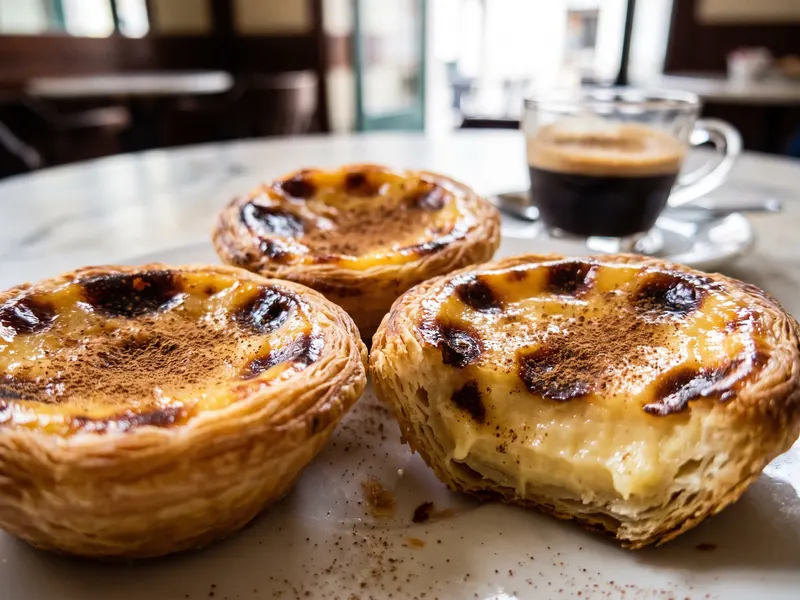
Bordeaux shops sell canelés in three sizes: a small one of 17 g, a medium one of 30 to 35 g and the classic of 60 to 65 g. This recipe uses the mould of the classic size. Like the Portuguese pastel de nata, it is a small custard pastry that is meant to come out of the oven dark: the nata in spots, the canelé all over.
Which canelé mould to use: nonstick, silicone or copper
A nonstick metal canelé tray is the mould this recipe is written for. Metal carries heat well, so the crust comes out dark and firm, and a thin film of soft butter is enough to release the canelés. If your tray has 6 or 8 cavities and not 12, bake in two rounds. Keep the rest of the batter in the fridge and take it out 1 hour before its turn. Before the second round, stir the batter again from the bottom, butter the tray again and bring the oven back to 230 °C.
A silicone mould is cheap and easy to clean, but it carries heat less well. The canelés come out lighter brown and a little softer. They need 50 to 60 minutes at 190 °C after the first 20 minutes at 230 °C, and then 10 minutes in the mould before you push them out. Check that the silicone is rated for 230 °C as well.
Tinned copper moulds are the Bordeaux tradition. Their traditional coating is beeswax, which some bakers mix with butter or clarified butter, and it gives the hard, glossy crust of a pastry shop canelé. Copper moulds are expensive and are never washed with detergent, so they make sense only if you bake canelés often.
Without a canelé mould, small pudding or jelly moulds give the closest shape. Foil baking cups also work, though without the fluted shape. Check that whatever you use is rated for the oven temperature, because many pudding and jelly moulds are made for chilling and not for a hot oven. Fill them about three-quarters full and go by colour and not by the clock, since baking time changes with the size and the material of the mould.
How to serve canelés
Let the canelés cool for about 1 hour before you eat them. Straight from the oven the crust is still soft, and it hardens only as the caramelised sugar cools. Eat them the same day if you can, since they are at their crispest in the first 6 hours.
In Bordeaux the small ones are served with coffee. The classic size is enough on its own with coffee or tea. The recipe leaves you with 2 egg whites, which are a start on a batch of macarons.
Ingredients
- 400 mlmilk
- 1 vanilla pod
- 40 gbutter
- 200 gsugar
- 100 gflour
- 1 egg
- 2 egg yolks
- 3 tbspdark rum
Method
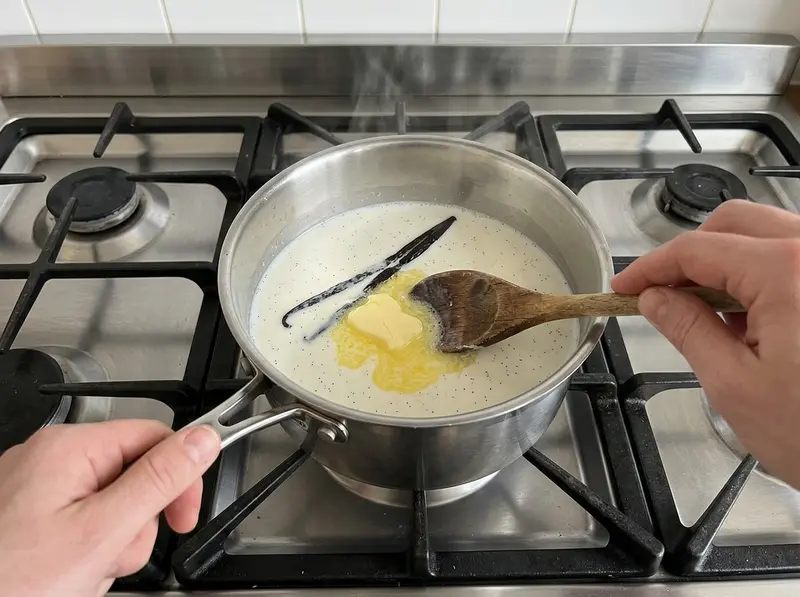
- Day 1, warm the milk. Pour 300 ml of the 400 ml of whole milk into a medium saucepan and keep the other 100 ml cold. Split the vanilla pod lengthwise, scrape the seeds into the pan with the tip of a knife and drop the pod in as well. Heat over medium heat for about 5 minutes, until the milk steams and small bubbles show at the edge, then take the pan off the heat. Add 30 g of the butter (unsalted), stir until it has melted, and pour in the 100 ml of cold milk. The milk is still too hot for the eggs at this point, because above 50 °C it starts to cook them. Leave the pan off the heat for about 15 minutes, stirring now and then, and weigh out the sugar and flour meanwhile. The milk is ready at 50 °C or below on a thermometer. Without one, wait until you can rest your palm against the side of the pan without wanting to pull it away, and a fingertip dipped in the milk feels warm and not hot.
- Mix the batter. In a large mixing bowl, whisk the 200 g of sugar (white granulated or caster) with the 100 g of flour. Use plain (all-purpose) wheat flour, not self-raising. Make a well in the middle and put in the egg, a large one of about 50 g without the shell, and the 2 egg yolks. Pour about a third of the warm milk into the well and stir in the centre with the whisk, drawing the flour in from the sides little by little. Add the rest of the milk in 2 more additions, then stir in the 3 tbsp of dark rum. Stir gently the whole time and do not beat, because overworked flour makes canelés climb out of the mould in the oven, and you do not want air in the batter either. The batter should be as thin as pouring cream, with no froth on top. A few small lumps do not matter at this point.
- Strain and rest. Pour the batter through a fine sieve, which catches the lumps, into a 1-litre jug, and put the vanilla pod back in. Press cling film directly onto the surface and put the jug in the fridge straight away, for 24 hours. Do not cut the rest below 12 hours, and bake within 48 hours, because the batter contains raw egg. The rest calms the batter so that it stays in the mould as it bakes. The batter also thickens a little, and the vanilla and rum come through more strongly. By the next day the flour and the vanilla seeds will have settled at the bottom of the jug.
- Day 2, check the mould and heat the oven. Take the jug out of the fridge 1 hour before you bake, so the batter comes back to room temperature. Before you switch the oven on, read the heat limit printed on your mould or its box, because the first stage of this recipe is 230 °C. Never set the oven above that limit. If the limit is 220 °C, bake the first stage at 220 °C. If it is lower than that, bake at the limit from start to finish and go by colour, which takes 45 to 70 minutes. Put a flat baking tray on the middle shelf and heat the oven to 230 °C. These temperatures are for a conventional oven without a fan. When the oven reaches temperature, let it run for 10 minutes more, because canelés need a fully hot oven from the first minute. Meanwhile, soften the remaining 10 g of butter and brush it into the 12 cavities of a nonstick metal canelé tray, each cavity about 5.5 cm across. You want a thin, even film in every flute and no pools of butter at the bottom.
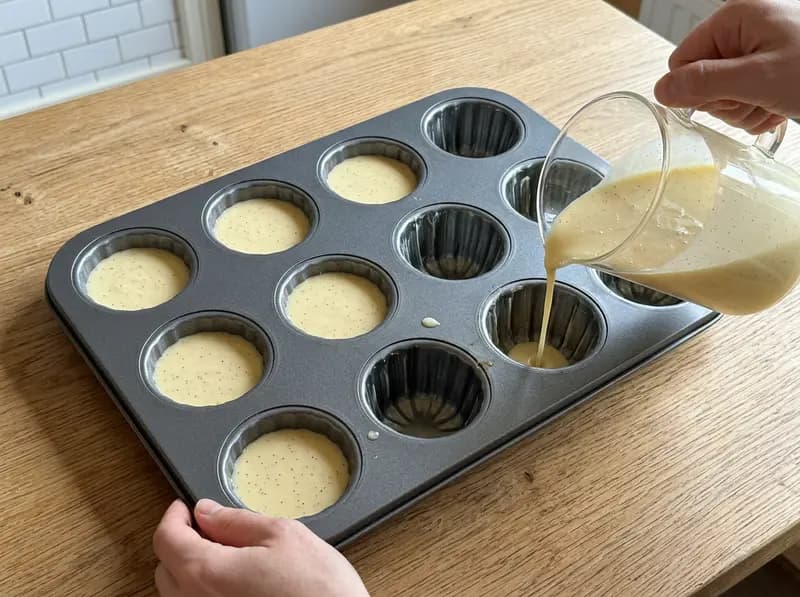
- Fill the mould and start hot. Take the vanilla pod out of the batter and stir slowly from the bottom of the jug with a rubber spatula until the settled flour and vanilla seeds are mixed back in. Do not whisk. Divide all of the batter evenly between the 12 cavities. Each ends up about three-quarters full, which is about 70 g. A silicone mould is floppy, so fill it while it stands on a cold tray or board and slide it from there onto the hot baking tray. Wearing oven gloves, pull the oven shelf out a little, set the canelé tray on the hot baking tray, push the shelf back and shut the door quickly. Bake at 230 °C for 20 minutes. This first blast of heat sets and colours the crust. After 20 minutes the batter has puffed up to the rims and the edges are starting to brown. A little above the rim is normal, and it sinks back.
- Turn the heat down. Lower the oven to 190 °C without opening the door, and bake for 30 to 40 minutes more. The lower heat cooks the centre gently. Open the door only if a canelé has risen well clear of its cavity and is spreading over the rim. In that case take the canelé tray out with oven gloves, tap it once on a folded towel so the canelés drop back, and return it at once. Start looking through the door after 30 minutes. The canelés are ready when the tops are a deep chestnut brown, very dark but not black. If the tops are nearly black before that, lay a sheet of foil loosely over the tray. If your oven browns one side faster, turn the tray round once, about halfway through this stage, and do it quickly. In a silicone mould this stage takes longer, 50 to 60 minutes, so go by the colour of the tops.
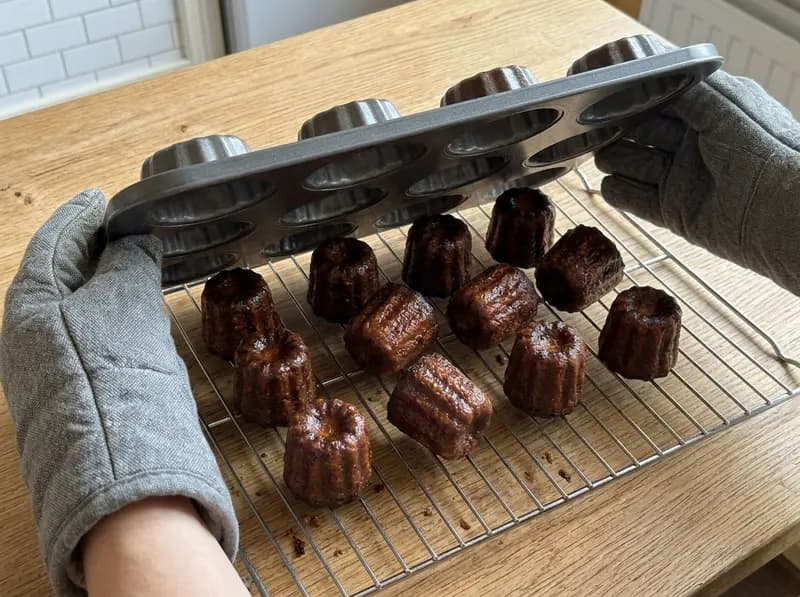
- Unmould and cool. Leave the oven on for now. Take the canelé tray out and, wearing oven gloves, turn it over onto a wire rack straight away. Hot canelés leave a metal mould cleanly, and they stop cooking once they are out. A silicone mould is the exception: leave the canelés in it for 10 minutes, then push them out one at a time. Look at the sides, which should be the same dark brown from top to bottom. If they are pale or patchy, put the canelés back into the cavities and bake at 190 °C for 5 to 10 minutes more, until the colour is even. If only the end that sat at the bottom of the cavity is pale, put them back the other way up, with the pale end showing. Leave the canelés on the rack for about 1 hour. As they cool, the caramelised sugar hardens into a crust, and the inside stays soft, with a honeycomb of small holes.
FAQ
Rest canelé batter in the fridge for 24 hours. Several recipes set the minimum at 12 hours, so batter mixed in the morning can be baked late that evening, but not sooner. The rest calms the flour, which keeps the canelés from climbing out of the mould, and it gives the vanilla and rum time to come through. Do not go past 48 hours, because the batter contains raw egg. Take the jug out of the fridge 1 hour before baking and stir the batter slowly from the bottom, since the flour and vanilla seeds settle.
Canelés that climb out of the mould usually mean the batter was beaten, it rested less than 12 hours, or the oven was not fully hot. Stir gently, rest the batter for 24 hours, and let the oven run 10 minutes past 230 °C with a baking tray inside before you bake. A little rise above the rim in the first 20 minutes is normal and sinks back, but if the canelés still catch on the rim, put a little less batter in each cavity next time. A dense inside with no honeycomb points to an oven that was too cool. Check yours with an oven thermometer before the next batch, because home ovens often run 10 to 20 °C below the setting.
For a home oven, a nonstick metal canelé tray is the easiest way to a dark crust, because metal carries heat better than silicone. This recipe uses a tray of 12 cavities about 5.5 cm across, brushed with 10 g of soft butter. Silicone works too, but the crust comes out lighter and a little softer, the second stage at 190 °C takes 50 to 60 minutes, and the canelés stay in the mould for 10 minutes before you push them out. Tinned copper moulds with a beeswax coating are the traditional Bordeaux choice and give the darkest, glossiest crust, but you do not need them at home. With no canelé mould at all, crème brûlée gives you vanilla custard under a burnt sugar crust in plain ramekins.
Canelés are at their crispest in the first 6 hours after baking. They are still good the next day, though the crust softens. Keep them at room temperature in a bag or a box so they do not dry out. One French pastry site says never to put canelés in the fridge, so use it only in hot, humid weather, with each canelé wrapped and all of them in a sealed bag. To keep them longer, wrap each one, freeze them in a freezer bag and eat them within 2 weeks, then thaw them in the fridge and warm them in the oven at 150 °C for 10 minutes, which brings the crust back.
Yes. Some French recipes mark the rum as optional and simply leave it out, and at least one Bordeaux canelé maker sells a vanilla canelé without alcohol. Leave out the 3 tbsp of dark rum and change nothing else. A Bordeaux pastry chef quoted by the French magazine Slate picks aged rum partly for the colour it gives, so the crust may come out a shade lighter. The canelés will taste of vanilla only, so do not skip the vanilla pod, and make this version if children will eat them, because the recipe as written contains alcohol.
Keep browsing
More dishes from the French archive — picked by overlap with what you're cooking now.
Recipes by email
One letter a week: a recipe picked for your taste, plus whatever is new on the site. Unsubscribe in one click.
Welcome gift: Sergei's cookbook (e-book).
By subscribing you agree to the privacy policy.
Tell us what you like to cook (30 seconds) →
Join the conversation
Comments
No comments yet — be the first!